
ControlNet is a game-changer for artists using Stable Diffusion models, offering a new way to bring their artistic visions to life. It's as if you have a knowledgeable assistant who truly understands your artistic vision. Imagine the desire to infuse your work with the charm of Impressionism or the need to create a bunchof characters within an environment for a game. That's where ControlNet comes in handy. It excels at transforming your ideas into reality, exactly as you imagined. Using innovative technology, the system adjusts and enhances the images to achieve the desired outcome.
What is ControlNet?
At its core, ControlNet is a neural network architecture that acts as a smart addition to Stable Diffusion. It's a type of generative model that lets you guide the creation of digital art in the way that was hard to do before. Unlike traditional generative adversarial networks (GANs), which use generator and discriminator networks to produce images, diffusion models take a different approach. They start with a distribution of random noise and gradually refine it through a series of steps into a coherent image that matches a given textual description.
ControlNet elevates this process by embedding a layer of conditional controls within the diffusion model. These control vectors, condition the model to output in a specific way which is desired by the user. The advantage of using these control vectors is to define things which cannot be defined by words. This level of granularity in control enables users to dictate not just the content of the generated images, but also their style, composition, and even emotional tone.
The inclusion of ControlNet into diffusion models marks a significant milestone in the evolution of generative art. Traditional Diffusion models are inherently random, control net provides a way to achieve more granular control over the generations. ControlNet addresses this challenge head-on by providing a suite of conditional parameters that users can manipulate to guide the image generation process more precisely.
For instance, an artist looking to generate a digital painting in the style of Impressionism can specify not only the subject of the artwork but also influence the brushstroke texture, color palette, and lighting conditions. Similarly, a game developer can use ControlNet to create diverse character assets that conform to a particular aesthetic or thematic universe, ensuring consistency across the visual elements of the game.
Role of ControlNet in Stable Diffusion
The role of ControlNet within the Stable Diffusion model framework significantly enhances the capability and flexibility of generating AI-driven digital imagery. Stable Diffusion, known for its power to turn textual descriptions into vivid images through a process of iteratively refining noise, provides a robust base for generative art. ControlNet builds upon this foundation by introducing a level of control and specificity previously unseen in similar models.
Enhancing Precision in AI-Generated Art with ControlNet
ControlNet introduces an unprecedented level of specificity and control over the Stable Diffusion process, allowing users to fine-tune the output to match exact requirements. This precision control is a game-changer for professionals seeking to leverage AI in creative fields.
.png)
Fine-Tuning Image Generation with Advanced Attention Mechanisms
The implementation of sophisticated attention mechanisms through ControlNet ensures that every detail in the textual description is accurately captured and represented in the generated images. This focus on detail enhances the model's ability to produce relevant and coherent visuals directly aligned with user inputs.
Customized Visuals through Conditional Image Generation
At its core, ControlNet introduces control vectors to the Stable Diffusion process, allowing for detailed customization beyond the capabilities of traditional models. Unlike the broad-strokes approach of GANs (Generative Adversarial Networks), ControlNet enables fine-grained adjustments.
- Conditional Embeddings: Utilizes textual or image-based embeddings to guide the generation process, ensuring outputs align with specific themes or styles.
- Cross-Attention Layers: Employed within the model to focus on and amplify relevant features from the input text, translating subtle nuances directly into the visualization process.
Using ControlNet with Comfy UI
ComfyUI stands as a beacon for both artists and non-technical users navigating the complex world of AI-driven art generation. This intuitive interface demystifies the process, turning the intricate mechanisms of models like ControlNet into accessible tools for creative expression. Imagine having the power to direct an orchestra of pixels and styles, all at your fingertips, without needing to understand the music theory behind the composition. That's the essence of ComfyUI - it transforms the technical into the tangible, enabling users to focus on their artistic vision rather than the underlying code.
How ComfyUI Simplifies the Use of Complex Models for Non-Technical Users
ComfyUI is akin to a digital art studio where the brushes and paints have been replaced with sliders, buttons, and interactive nodes. These user-friendly controls allow individuals to adjust parameters such as style, mood, and composition with ease. By providing a graphical interface that abstracts away the complexities of the backend AI models, ComfyUI empowers users to experiment with and explore their creativity without the barrier of technical knowledge. It's about making the power of AI art accessible to all, bridging the gap between advanced technology and everyday creativity.
Bringing ControlNet into the ComfyUI ecosystem marks a significant step forward in customizing AI-generated imagery. This integration combines the precision control of ControlNet with the user-centric design of ComfyUI, offering an unmatched toolset for creating bespoke digital art.
- Digital Art and Game Design:
- Style Mimicry: Artists can command the model to replicate the brushstrokes and color palettes of Impressionist masters, bringing a level of artistic emulation that respects the nuances of historical art movements.
- Character Consistency: Game developers can generate character assets that adhere to the unique aesthetic of their game world, ensuring visual consistency while streamlining the creative pipeline.
- Marketing and Branding:
- Branded Content Creation: Marketers can specify brand colors, themes, and motifs, enabling ControlNet to produce imagery that's not just visually appealing but also brand-coherent, enhancing campaign resonance with target audiences.
The synergy between ControlNet and Stable Diffusion doesn’t just fine-tune image generation; it opens up a landscape of creative possibilities. By dictating elements such as emotional tone or artistic style through specific control vectors, creators can explore new horizons in digital imagery, pushing the boundaries of what AI can achieve in art and beyond.
Step-by-Step Guide
Integrating ControlNet with ComfyUI can transform your approach to generating AI-driven art and animations. This detailed step-by-step guide will walk you through setting up your system, installing necessary dependencies, and making the most out of the innovative features offered by ComfyUI and ControlNet.
System Requirement Specifications
Before you start, ensure your system meets the following specifications to run ComfyUI and ControlNet smoothly:
- Operating System: Windows 10 or later.
- Graphics Card: NVIDIA GPU with at least 10GB of VRAM. This is crucial for processing high-resolution images and running multiple ControlNets. For resolutions around 512x512, 8GB VRAM may suffice for simpler tasks.
- RAM: 16GB or higher recommended for optimal performance.
- Processor: Quad-core CPU or higher.
Installing Dependencies
- 7zip: Needed to unpack the ComfyUI package. Grab it from 7zip's homepage and follow the setup instructions.
- FFmpeg (Optional): For creating gifs or videos from images. Obtain it from FFmpeg's website, extract it, and add its bin folder to your PATH.
- GIT: Essential for fetching updates and extensions. Download and install from GIT's official site, ensuring it's added to your system's PATH for command-line use.
Installing ComfyUI and Animation Nodes
1. Download ComfyUI
- Use this direct link for the ComfyUI Windows portable version with NVIDIA support: https://github.com/comfyanonymous/ComfyUI/releases/download/latest/ComfyUI_windows_portable_nvidia_cu118_or_cpu.7z.
- Alternatively, visit the ComfyUI GitHub page for other versions: https://github.com/comfyanonymous/ComfyUI.
2. Extract ComfyUI
- Use 7zip to extract the downloaded .7z file to your desired location. No installation is needed, just extraction.
- This is the github repository of comfyUI.
3. Install Custom Nodes with GIT
- Navigate to the
custom_nodesdirectory within your ComfyUI folder. - Right-click in the folder and select "Git Bash Here" to open the Git command line.
- Execute the following commands to clone the necessary repositories:
4. Install Additional Dependencies through ComfyUI Manager
- Run
run_nvidia_gpu.batfrom the ComfyUI folder to start ComfyUI. - In ComfyUI, click on the "Manager" button, then "Install custom nodes."
- Search for "Auxiliary Preprocessors" and install ComfyUI's ControlNet Auxiliary Preprocessors.
- Repeat the process for "FizzNodes" and "VideoHelperSuite" for additional functionality.
- Making Videos with AnimateDiff
.png)
ComfyUI manager
.png)
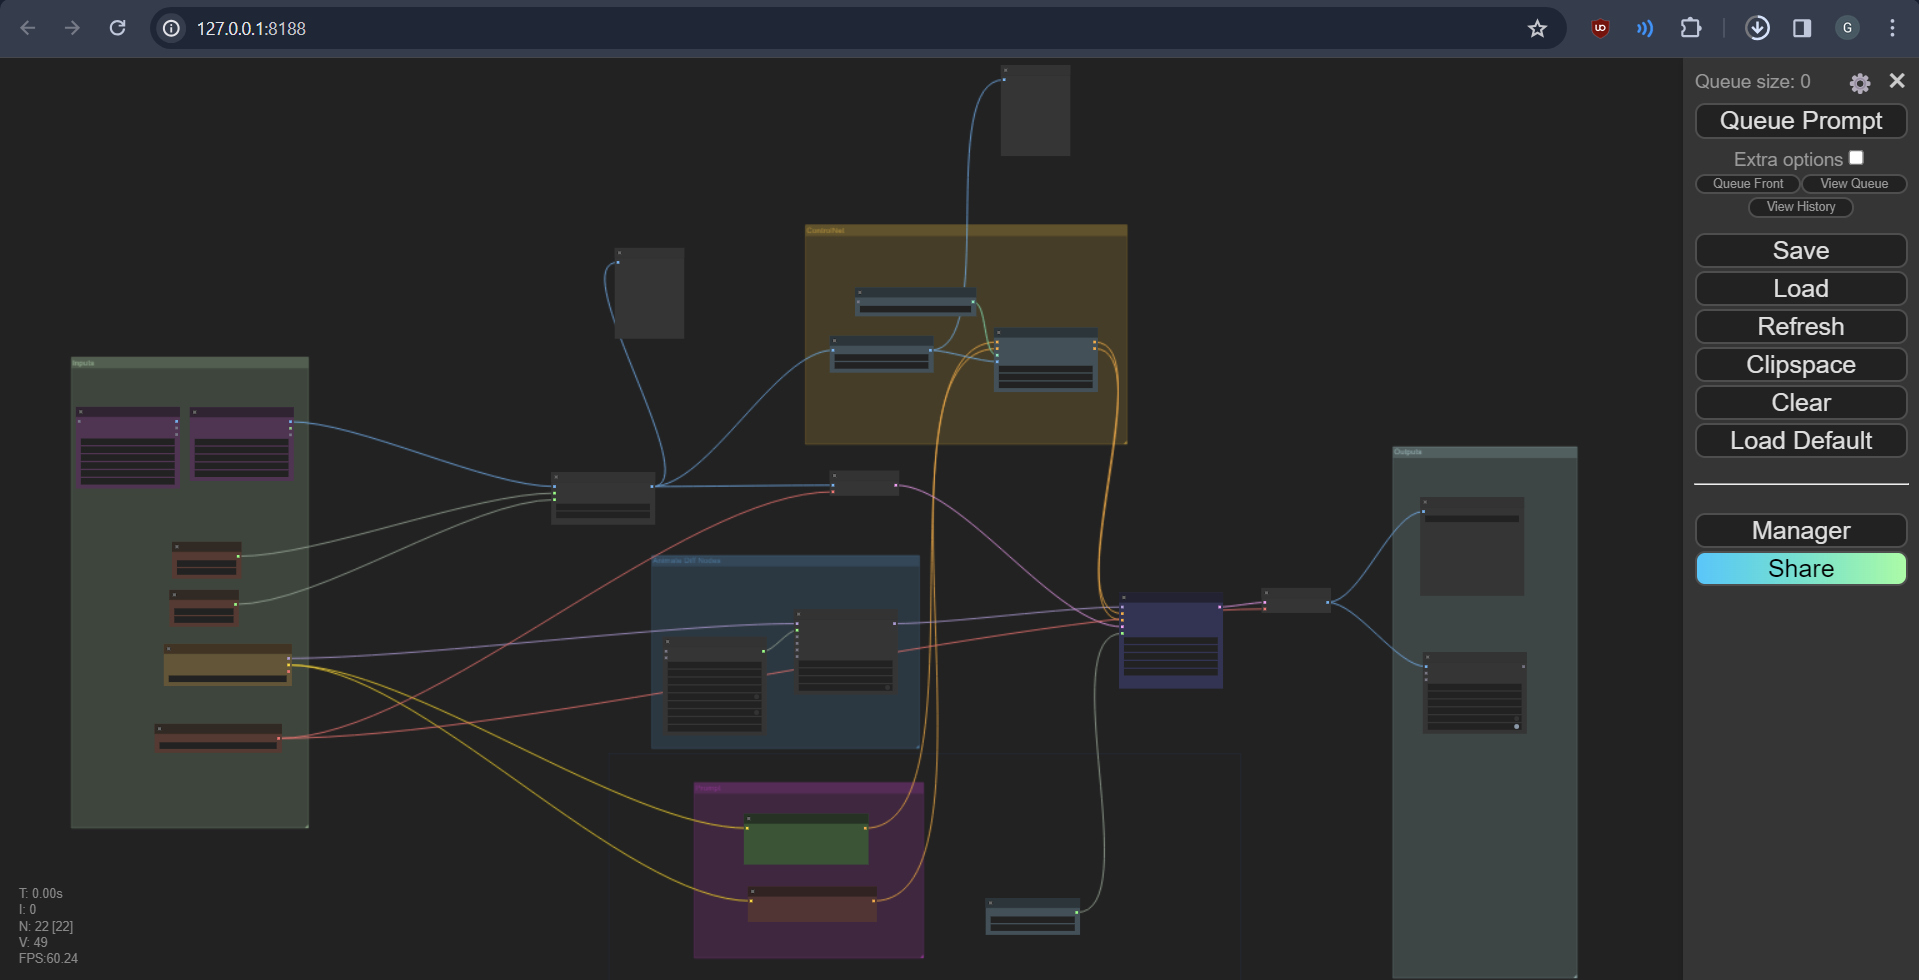
Default comfyUI screen
With ComfyUI and the necessary nodes installed, you're ready to start creating animations.
- Prepare Your Environment: Ensure all models and checkpoints are downloaded and placed in their respective folders as detailed in the installation section.
- Load a Workflow: Choose one of the workflows provided in the attachments or create your own. You can load a workflow by clicking "Load" or dragging the workflow file onto the ComfyUI interface.
- Customize Your Animation: Use the specific nodes to load images/videos, set prompts, and adjust ControlNet settings according to your project needs.
- Generate Your Animation: Once you're satisfied with your settings, run the workflow to generate your animation. This may take some time, depending on the complexity and resolution of your project.
Explaining Specific Nodes
Each node in ComfyUI serves a specific purpose in the animation creation process. For example:
- You can add a node by right clicking on blank space ->
Add Node.
.png)
- Loading Frames and Videos: Simply copy the directory of your frames into the "Load Images (Path)" node. For videos, use the "Load Video" node to automatically extract frames without pre-splitting them. Connect this node to where the "Load Images Path" node is usually connected for seamless integration.
.png)
- Frame Selection Tools:
- Set
image_load_capto 0 to load all frames, or specify a number to load a fixed amount, which determines your animation's length. - Use
skip_first_imagesto bypass initial frames. - The
select_every_nthoption lets you choose frames systematically (e.g., every second frame for2) to control the pacing of your animation.
- Set
- Model Configuration: The models associated with each node might differ. You'll need to manually select the appropriate models for your setup. If you can't find your models, ensure they're correctly placed as per the installation guide.
- For this tutorial, download the VAE from the following link and save it in the VAE folder: Download VAE. This specific VAE is a solid general choice, and overall, the choice of VAE doesn't drastically impact the results.
- Download checkpoint(s) and put them in the checkpoints folder. You can choose any model based on stable diffusion 1.5 to use. For my tutorial download: https://civitai.com/models/24779?modelVersionId=56071 also https://civitai.com/models/4384/dreamshaper. As an aside realistic/midreal models often struggle with animatediff for some reason, except Epic Realism Natural Sin seems to work particularly well and not be blurry. Put this in the checkpoints folder:
.png)
- Prompt Coloring: Positive prompts are green, and negative prompts are red. This color-coding is customizable. Note, the motion module uses your prompts to guide the animation (e.g., "walking" might generate walking motion).
.png)
- AnimateDiff Nodes and advanced Context Options: These settings enhance the flow of your animation by determining how frames are processed and combined:
- Context Length: The length of each animation segment. Stick close to the default for best results.
- Context Overlap: Determines the overlap between segments for smooth transitions.
- Closed Loop: Aims to make animations loop smoothly (mainly for vid2vid).
- Context Stride: Affects the consistency of the animation by providing a framework for filling in frames.
- These nodes control the animation process, including frame rate and motion paths.https://huggingface.co/guoyww/animatediff/blob/main/mm_sd_v15_v2.ckpt.
.png)
- ControlNet Setup: Includes a preprocessor for initial setup, ControlNet for applying effects, and controls for strength and animation range. The first use requires a download, which may take time. Customize the style, details, and elements of your animation using ControlNet's advanced features.https://huggingface.co/lllyasviel/ControlNet-v1-1/tree/main
.png)
- Prompt Scheduler (FizzNodes): Allows for dynamic prompt changes throughout the animation, with pre-text and append-text options for customization.
- KSampler - The Animation Engine: Here, you adjust the animation quality and style:
- Steps: More than 20 is necessary; higher numbers improve quality.
- CFG Scale: Adjust for different effects; higher values might be beneficial.
- Samplers and Denoise: Experiment with settings to find the best outcome for your project.
.png)
- Output and Saving: Determine how your final animation is compiled and saved, from frame rates to formats.
.png)
.png)
- Input Directory Management: Manage how your inputs are organized and addressed in the ComfyUI system to avoid duplications or mergers.
.png)
Workflow
The workflow within ComfyUI, especially when integrated with ControlNet, is designed to be intuitive and user-friendly. Starting with the loading of images or videos, users can apply a series of modifications through various nodes, each step bringing them closer to their final vision. By leveraging the unique strengths of ControlNet within ComfyUI, creators can experiment with a vast array of artistic styles and animations, making each project a new adventure in digital art creation.
Examples of ControlNet Usage
Below are succinct examples demonstrating how ControlNet and T2I-Adapters can be utilized in ComfyUI, highlighting their effectiveness in transforming raw images according to specific formats such as depth maps, canny maps, etc. Note the difference in efficiency between ControlNets and T2I-Adapters, with T2I-Adapters offering a more streamlined process without compromising on generation speed.
Scribble ControlNet with AnythingV3 Model:
- Input Image: A scribble or rough sketch serving as the base.
- Process: Utilizes the scribble controlnet combined with the AnythingV3 model.
- Output Image: A refined, detailed image generated from the initial scribble.
.png)
Depth T2I-Adapter vs. ControlNet:
- Input Image: An image requiring depth perception enhancement.
- Process (T2I-Adapter): Applies depth T2I-Adapter for depth effect.
- Process (ControlNet): Utilizes depth ControlNet for a similar effect but with a notable reduction in generation speed.
.png)
Pose ControlNet Example:
- Input Image: A basic pose requiring enhancement or modification.
- Process: A first pass with AnythingV3 using ControlNet, followed by a second pass without ControlNet using AOM3A3 model and its VAE.
- Output Image: A comprehensively enhanced image that respects the original pose with added depth and detail.
.png)
.png)
Mixing ControlNets for Creative Outputs:
- Input Image: A base image for experimental transformation.
- Process: Applying multiple ControlNets and T2I-Adapters sequentially to achieve unique effects.
- Output Image: An image that showcases the cumulative effects of multiple ControlNets, offering a novel visual experience.
.png)
These examples illustrate the versatility and power of ControlNet and T2I-Adapters in ComfyUI, enabling users to experiment with and achieve varied artistic and technical effects.
Resources
- ComfyUI and AnimateDiff Workflows: Discover comprehensive workflows with illustrative pictures on CIVITAI.
- Types of ControlNet implementation with comfyUI: https://comfyanonymous.github.io/ComfyUI_examples/controlnet/
- Creating Videos:
- Begin with the "Basic Vid2Vid 1 ControlNet" workflow for an introductory tutorial.
- Load your video frames or use the pre-split frames provided in the guide for a hands-on example.
- Explore node explanations within the guide to understand the function and customization of each component in the workflow.
- Community and Support:
- For further exploration and support, join the Discord community dedicated to Animatediff enthusiasts.
Elevate Your Digital Artistry with Ionio.ai
The integration of ControlNet with ComfyUI marks a transformative leap in the field of digital art and AI-driven content creation, offering unparalleled precision and creativity. This synergy between advanced AI and user-friendly interfaces opens up a realm of possibilities for artists, developers, and creators seeking to elevate their digital expressions.
Step into the era of enhanced digital creation with Ionio.ai’s state-of-the-art Generative AI technologies, including ControlNet and Stable Diffusion. Tailored for the visionary artist, innovative developer, and creative professional, our solutions are designed to seamlessly integrate into your workflow, empowering you to redefine the boundaries of digital art and content creation.
Embark on this journey with us. Schedule a direct consultation where we'll explore how Ionio.ai can transform your creative process, offering both the tools and support to harness the full potential of Generative AI.
Begin your transformative journey today. Discover how Ionio.ai can unlock new creative possibilities for you.